Have you ever heard of Horse Pose Yoga and been curious about what it means?
Yoga has been around for a long time and is known for its many health benefits. There are many poses that can help your physical and mental health in different ways. The Horse Pose Yoga is a unique and effective way to improve your flexibility and fitness level. It was inspired by the strength and balance of horses.
Table of Contents
The Horse Yoga Pose can help you find your inner power and balance. Adopt this strong pose to become more flexible, feel less stressed, and connect your mind and body in a way that works well for you . Do it right now!
horse pose yoga
Even though the Horse Yoga Pose looks new, it has its roots in very old practices. Animal-themed yoga poses have always been a part of regular yoga classes. While horses are graceful and strong, the Horse Pose takes these traits and turns them into a useful yoga pose. It has changed over the years to fit current fitness needs and is now popular among yoga fans all over the world.
Benefits of Horse Yoga Pose
Physical Benefits
Stress Reduction: Like many yoga poses, the Horse Pose Yoga is excellent for reducing stress. The combination of physical exercise and focused breathing helps in calming the mind.
Mindfulness and Focus: Holding the Horse Pose requires concentration and control, promoting mindfulness and enhancing mental focus.
Improved Flexibility: One of the best things about the Horse Yoga Pose is that it makes you more flexible. In this pose, different muscle groups are stretched, which helps the hips and legs move more freely.
Strength Building: When you do the Horse Pose regularly, your lower body gets stronger. You can feel your thighs, calves, and hips getting a good workout from this pose.
Enhanced Balance: Keeping your balance in the Horse Pose helps you get better at stability and rhythm, which are important for doing other yoga poses and everyday tasks.
Better Posture: Along with making you more flexible, the horse pose yoga can also help you stand up straighter. Your hips and legs will be working when you do the horse pose, which will help straighten your back. When you do yoga and work out your abs, your balance will get better.
Improve Circulation: If you do the horse pose regularly, it will also help your blood flow. The horse pose will make your heart beat faster and help your blood get more oxygen. Every single one of these things will help the blood flow.
Mental and Emotional Benefits
Stress Reduction: Like many yoga poses, the Horse Pose Yoga is excellent for reducing stress. The combination of physical exercise and focused breathing helps in calming the mind.
Mindfulness and Focus: Holding the Horse Pose requires concentration and control, promoting mindfulness and enhancing mental focus.
Preparing for Horse Yoga Pose
Before doing the Horse Pose Yoga, you need to make sure you’re ready to get the most out of it and avoid getting hurt.
Warm-Up Exercises
To open up your muscles, start with light warm-up. Light exercise and gentle stretches can help your body get ready for the pose.
Essential Equipment
You don’t need much equipment, but a good yoga mat provides the necessary support and grip. Wearing comfortable clothing that allows for free movement is also crucial.
Setting the Right Environment
Choose a quiet, comfortable space where you can practice without distractions. A serene environment helps in achieving better focus and relaxation.
Step-by-Step Guide to Performing Horse Yoga Pose
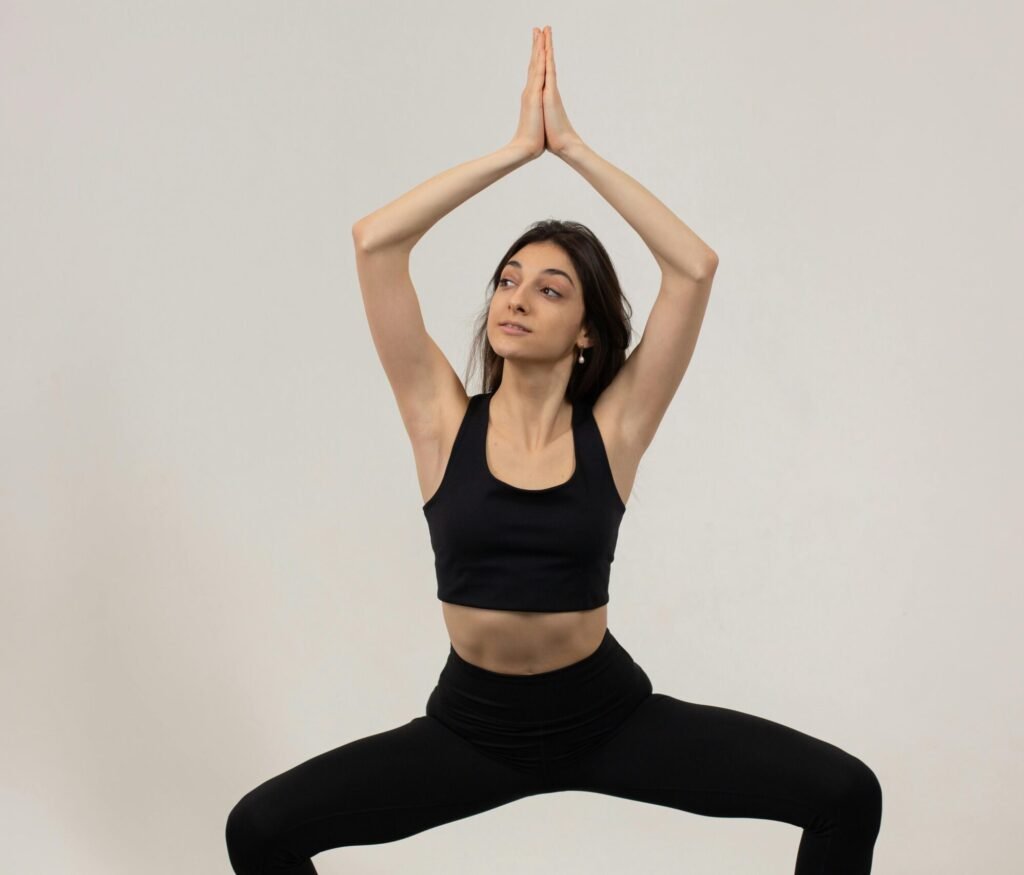
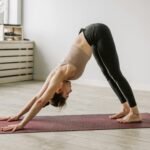
REFERENCE IMAGE “View Image for Clearer Understanding”
Paying close attention to details and focusing on good balance are needed to get good at the Horse pose yoga. Make sure you do the pose properly and safely by following this step-by-step guide.
Initial Position
- Stand Tall: Begin by standing in Tadasana (Mountain Pose) with your feet hip-width apart. Ground your feet firmly into the mat, distributing your weight evenly across both feet.
- Engage Your Core: Activate your core muscles by drawing your navel towards your spine. This engagement helps maintain stability throughout the pose.
- Relax Shoulders: Roll your shoulders back and down, creating space in your neck and keeping your upper body relaxed.
Executing the Pose
- Step Out: From your initial position, take a wide step out with your right foot, ensuring that your feet are significantly wider than your hips. Your feet should be parallel to each other.
- Turn Feet Outward: Slightly turn your feet outward at a 45-degree angle. This adjustment helps in aligning your knees with your toes during the bend.
- Bend Your Knees: Slowly bend your knees, lowering your hips as if you are sitting back into an invisible chair. Your thighs should aim to be parallel to the floor. Ensure that your knees are aligned over your toes and not extending past them.
- Lower Hips: Sink your hips lower, deepening the bend in your knees while keeping your back straight. Your pelvis should remain neutral, avoiding any excessive tilt.
- Extend Your Arms: Raise your arms to shoulder height and extend them out to the sides with palms facing down. This arm position helps in maintaining balance and engages the muscles in your upper body.
- Engage Your Thighs: Press your knees outward to engage your inner thighs. This action helps in stabilizing the pose and prevents your knees from collapsing inward.
- Hold the Pose: Maintain this position, holding the pose for several breaths. Start with holding for 15-30 seconds and gradually increase the duration as you build strength and confidence.

You might be Interested In “TOP 10 HALLOWEEN-INSPIRED POSES: SPOOKY STRETCH”
Maintaining Proper Form
- Straight Back: Ensure your back remains straight and your chest is open. Avoid leaning forward or arching your back excessively.
- Knees Over Toes: Continuously check that your knees are aligned over your toes, not extending past them. This alignment protects your knees from strain.
- Neutral Pelvis: Keep your pelvis in a neutral position, neither tilting forward nor backward. This positioning helps in maintaining a straight spine.
- Balanced Weight: Distribute your weight evenly across both feet, avoiding leaning more on one side.
Common Mistakes to Avoid
- Knees Inward: Avoid letting your knees collapse inward. Press them outward to maintain proper alignment.
- Arching Back: Keep your back straight and avoid excessive arching, which can strain your lower back.
- Shallow Stance: Ensure your stance is wide enough to engage the proper muscle groups effectively.
- Overextending Knees: Do not allow your knees to extend past your toes, which can cause strain and injury.
Tips for Beginners
- Narrower Stance: Beginners can start with a slightly narrower stance to reduce the intensity of the pose. Gradually widen your stance as you become more comfortable.
- Less Knee Bend: Initially, bend your knees less deeply to make the pose more manageable. As your strength and flexibility improve, deepen the bend.
- Use a Wall: Practice the pose against a wall for additional support and stability.
Advanced Variations
- Heel Lifts: To increase the difficulty, lift one heel off the ground, balancing on the ball of your foot. This variation challenges your balance and strengthens your calves.
- Deeper Squat: For a more intense workout, lower your hips further towards the ground, increasing the bend in your knees and deepening the squat.
- Arm Variations: Experiment with different arm positions, such as reaching overhead or bringing your hands to your heart center in a prayer position.
Using Props for Support
- Yoga Blocks: Place yoga blocks under your hands for added support if you find it challenging to maintain balance. This modification helps in gradually building strength and confidence.
- Chair Support: Use a chair for additional stability by holding onto the back of the chair as you perform the pose. This support is particularly helpful for beginners or those with balance issues.
Breathing Tips
- Steady Breath: Maintain a steady and even breath throughout the pose. Inhale deeply through your nose and exhale through your mouth, focusing on slow, controlled breaths.
- Engage with Breath: Use your breath to help maintain focus and stability. Inhale as you prepare to hold the pose and exhale as you deepen into it.
By following these detailed steps and tips, you can perform the Horse Yoga Pose with confidence and reap its full benefits. Remember to listen to your body, progress at your own pace, and enjoy the journey towards improved strength and flexibility.
FAQ
Most frequent questions and answers
The Horse Yoga Pose is a standing pose that enhances flexibility, strength, and balance by mimicking the stance of a horse.
For best results, practice the Horse Pose daily or at least a few times a week, incorporating it into your regular yoga routine.
Yes, beginners can do the Horse Pose with modifications. Start with a narrower stance and less knee bend.
Wear comfortable, stretchy clothing that allows for free movement. A good yoga mat is also essential.



[…] YOU MIGHT BE INTERESTED IN READING ABOUT “HORSE POSE YOGA: GUIDE, PRACTICING TIPS AND BENEFITS.” […]